

Manual Badge Printing

Feb 25, 2025
 45
45
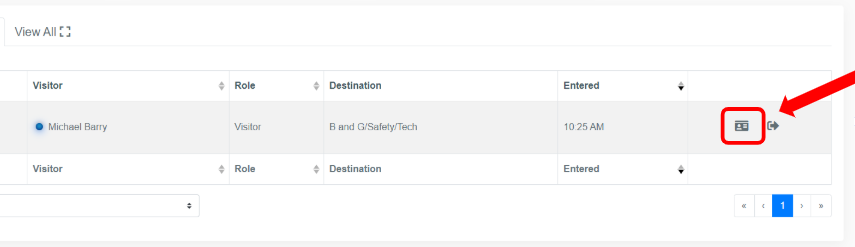
- Go to the visitor and click on the “Print Badge” icon
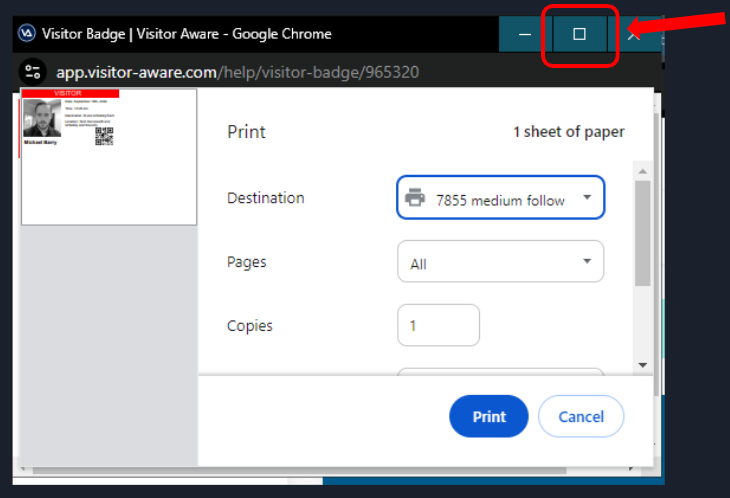
- Once the Print Screen opens, maximize the window to help change settings
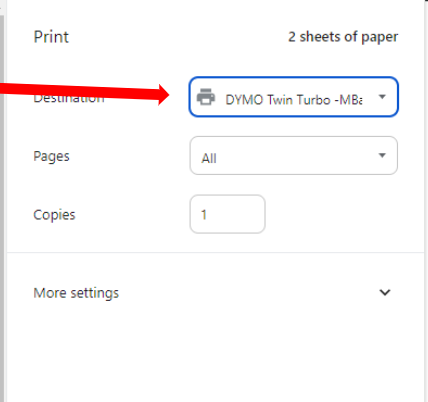
- First make sure you have the Dymo printer selected as the “Destination”
- Your printer will have a different name then the one in the picture below
- Then you will need to expand the “More settings” menu and make two changes
- Set the “Margins” option to “None”
- Change the “Scale” option to “Custom” and set it to 70
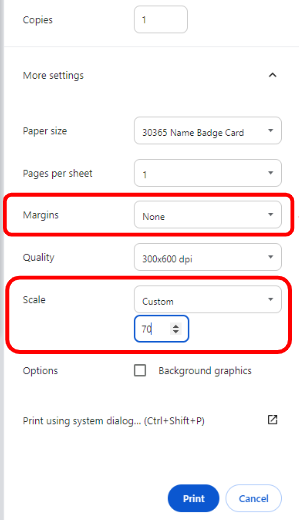
- After you change those setting you will just need to hit print and you should be all set.
*Please note*
Those setting may stay when you go to print something else that is not a badge and you will have to reset those everytime if you are switching between printers on the computer. The good news is you should only be manually printing if you forgot to open the “Print Helper” or if you are printing badges from a “Batch Check In”.

